
Learn how to make this crochet pin display using the beautiful star stitch.
Creating this crochet pin display after seeing AllAboutAmi’s DIY bag for her entire pin collection was very called for. I could never afford such a pin haul so knew I needed to scale things down.
Wanting to try something new and include texture, I had been thinking about what to experiment with. When I came across the star stitch I knew it would make a gorgeous base for another wall hanging.

Pins!
My pin collection isn’t quite as vast as Ami’s but they are treasured nonetheless. This crochet pin display isn’t large so I was looking forward to trying out the new stitch. I’ve seen a few variations of the star stitch, and it goes by different names. Below you will find detailed of instructions of the technique I used.
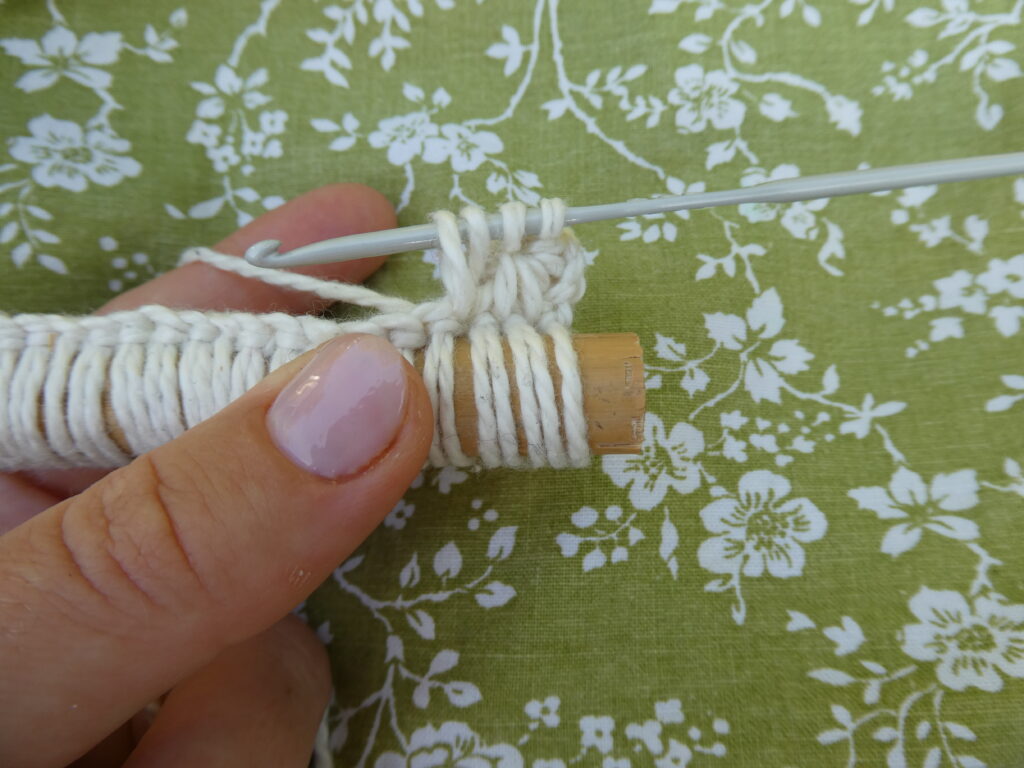
This is crocheted around some bamboo so it hangs nicely working from the bamboo so you don’t need to attach anything afterwards.
If you need to learn more about how to crochet around an object, check out this tutorial.
Star Stitch
Start from your foundation row (multiples of 2, + 3CH). A star stitch needs two rows to complete – working back and forth, by turning the piece at the end of each row.
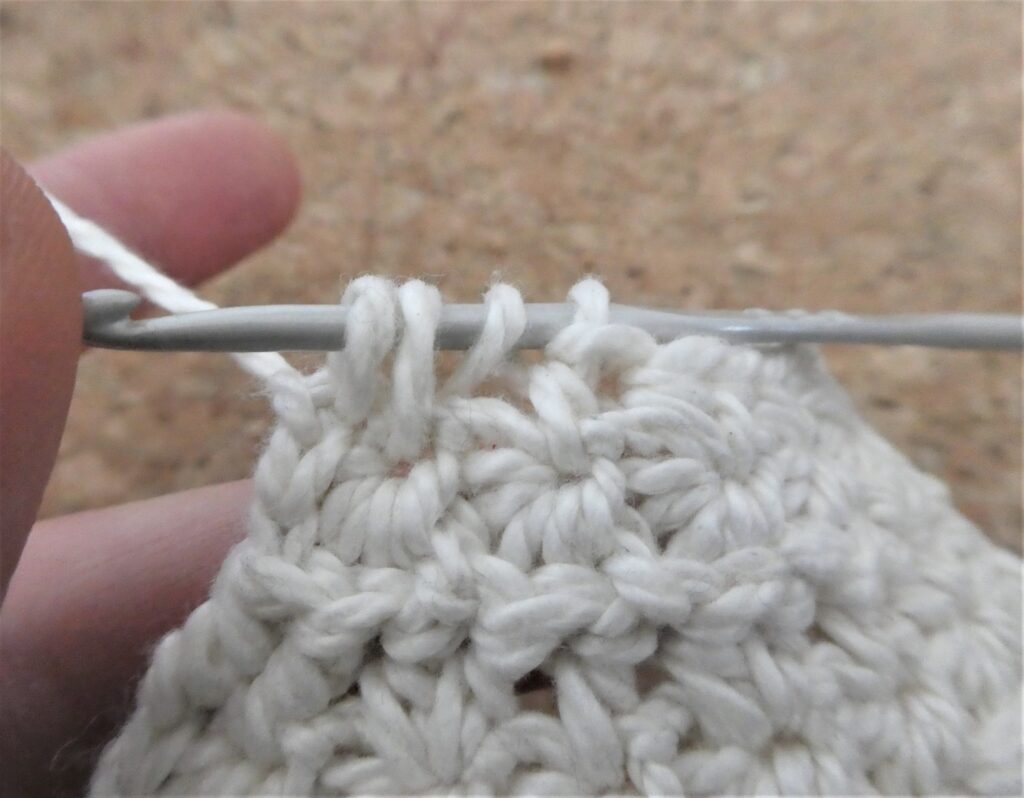
The first row of the star stitch creates the lower six spikes.
Starting from the second chain from your hook, insert hook, yarn over and pull through, repeat for six stitches, leaving six hoops on your hook.

With the six hoops on your hook, yarn over and pull through all six hoops to join the spikes together.

Close the star stitch with 1CH. This creates the EYE.

Now you can work on the next lower star stitch. Insert hook in the eye, yarn over and pull through.

You should now have two hoops on your hook.

Now, we work down the side of the spikes to begin the next star. Insert your hook in between the last two spikes (of previous star stitch) this will create the third hoop on the hook.

Similarly, for the fourth hoop on the hook, insert your hook underneath those last two spikes.
For the fifth and sixth, work into the next two stitches along the bamboo.

Remember to close each eye with 1CH.

Keep repeating until you reach the end of the row. For this project, I have a total of X14 STAR STITCHES.
Now, the second row of the star stitch to complete. 1CH to build height, crochet X2HTR in each of the eyes of the previous row.

When you reach the end, there should be one stitch left which will need 1HTR.

INSTRUCTIONS: ***UK TERMS***
Materials:
- 3ply yarn approx. 100g
- 2.5mm hook
- Bamboo or stick
- Needle to weave ends
- Pins!
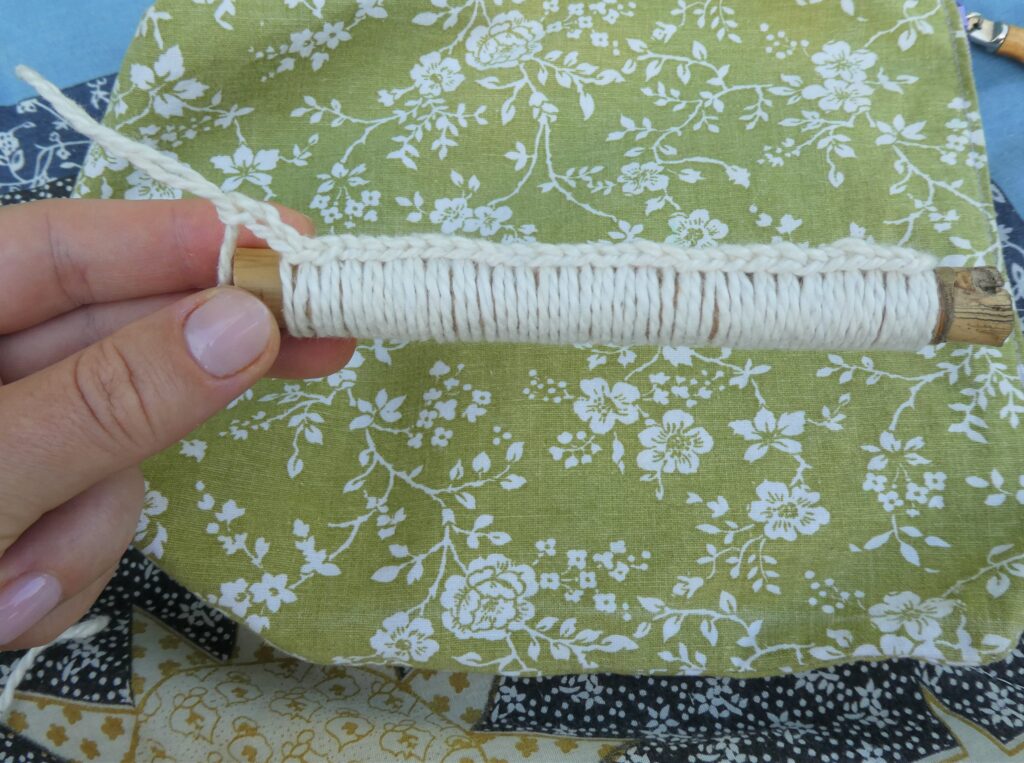
| 1 | 29DC AROUND THE BAMBOO OR STICK, 3CH, TURN | = 32 ST |
| 2 | WORK X14 STAR STITCHES BASES ACROSS, 1CH, TURN | = 28 ST |
| 3 | FINISH THE TOPS (2HTR IN EACH EYE)X14, 1HTR IN LAST ST, 3CH, TURN | = 29 ST (14 STAR STITCHES) |
REPEAT ROWS 2&3 TO DESIRED LENGTH
THIS PROJECT = 12 ROWS OF STAR STITCHES (24 ROWS IN TOTAL) before the decreasing starts.
Now we need to start decreasing stiches to create the narrowing tail at the bottom of the crochet pin display.
| 25 | WORK X14 STAR STITCH BASES, 1CH, TURN | = 28 ST |
| 26 | WORK (1HTR IN 1st EYE, 2HTR IN NEXT EYE)X10, 1HTR IN LAST ST, 3CH, TURN | = 21 ST |
| 27 | WORK X10 STAR STITCH BASES, 1CH, TURN | = 10 STAR ST |
| 28 | WORK (2HTR IN 1st EYE, 1HTR IN NEXTEYE)X7 DECREASE REMAINING 2 STITCHES , 3CH, TURN | = 15 ST |
| 29 | WORK X7 STAR STITCH BASES , 1CH, TURN | = 7 STAR ST |
| 30 | WORK (1HTR IN 1st EYE, 2HTR IN NEXT EYE)X5, 3CH, TURN | = 11 ST |
| 31 | WORK 5 STAR STITCH BASES, 1CH, TURN | = 5 STAR ST |
| 32 | WORK 2HTR IN 1st EYE, 1HTR IN NEXT EYE, 2HTR, 1HTR, 1HTR IN LAST EYE, 1HTR IN LAST STICH OF PREVIOUS ROUND, 3CH, TURN | = 8 ST |
| 33 | WORK 3 STAR STITCH BASES, FASTEN OFF | = 3 STAR ST |
Weave in the ends and there you go.
Ready for pin assembly and to be hanged.
